Work with lists
Most pages in Propeller open with a list: orders, quotes, companies, products. The controls above and below the table are the same everywhere, so this page explains them once.
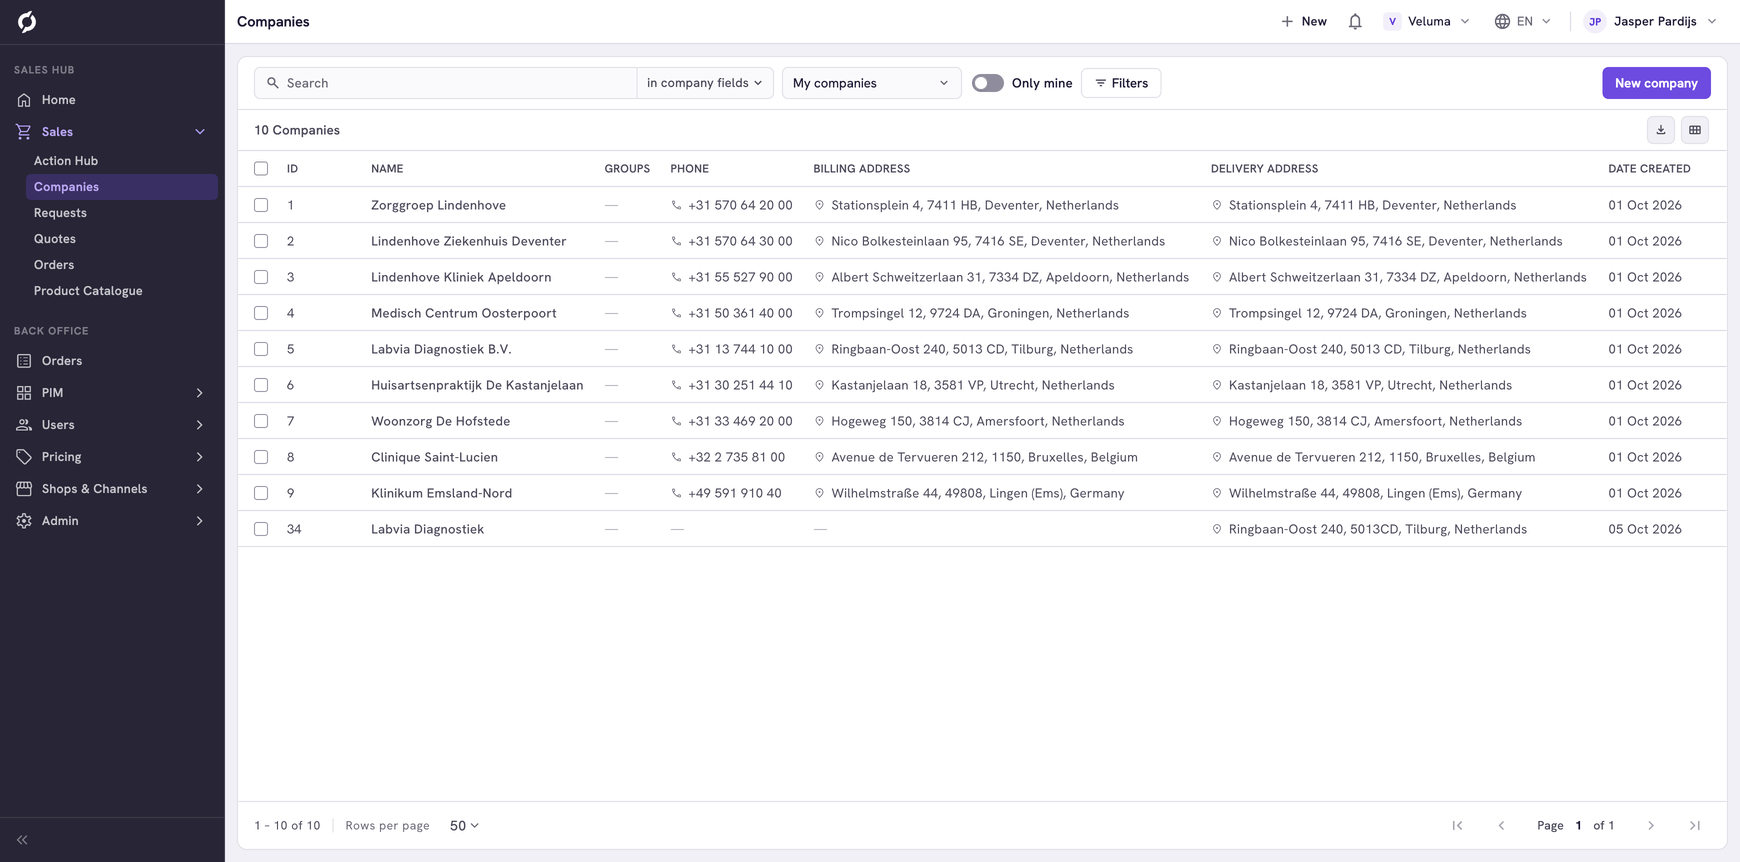
The row above the table holds the search, the filters and the buttons of the page. The column headings stay in view while you scroll, and the page controls stay at the bottom of the screen.
Find a row
- Type in the search field. Most lists start searching after three characters. Until then the field says how many characters it still needs.
- To search in other fields, click the scope next to the field, for example in company fields.
- Tick the fields under Search fields.
The scope reads in all fields when every field is ticked. Click the × in the field to clear the search. Click a row to open it.
Filter the list
- Click Filters. The Filters panel opens next to the rows.
- Set a filter, for example a period under Date Created. The list follows at once, and the panel shows how many rows match.
- Click Filters again, or the × of the panel, to close it.
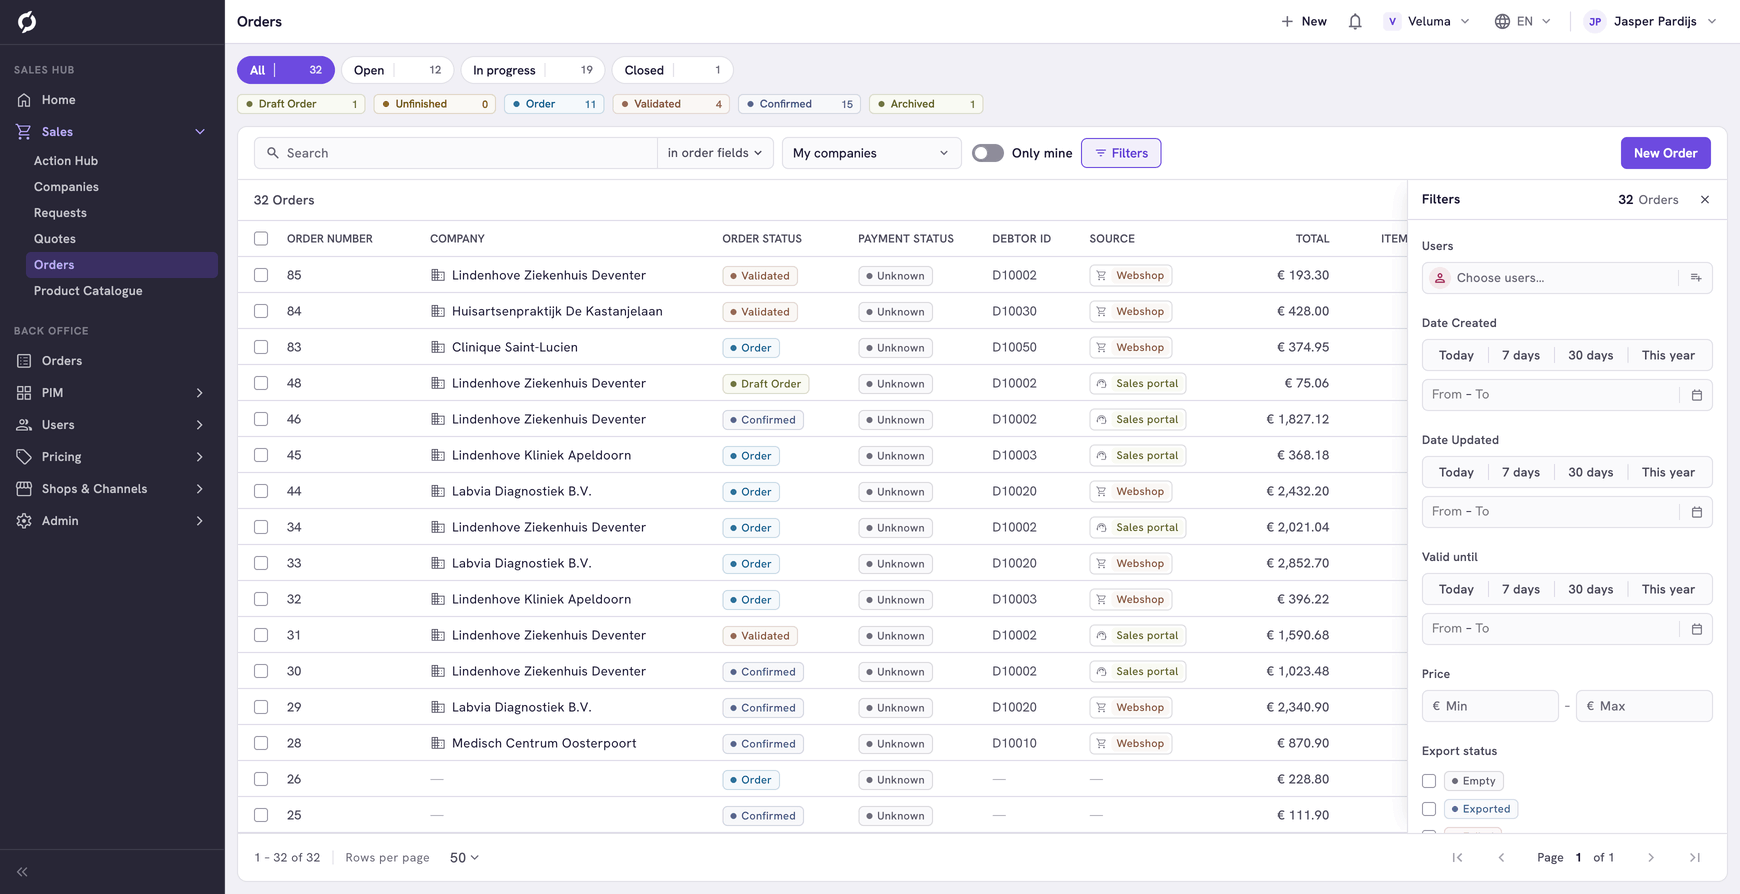
The number on Filters says how many filters are set. Every filter you set also shows as a chip above the table. Click the × on a chip to remove that filter, or click Clear filters to remove them all.
Sort the list
Click a column heading to sort on that column. Click again to turn the order around. Not every column can be sorted.
Change the width of a column
Drag the edge of a column heading to make the column wider or narrower. Each row stays on one line. The list keeps the widths you set.
Show only your own companies
My companies is a personal filter in the Sales Hub lists and the order list of the Backoffice.
- Click My companies.
- Tick the companies you work with. Type in Find a company to find one.
- Click outside the panel to close it. The button now shows how many companies you picked, for example My companies · 3.
- Switch on Only mine.
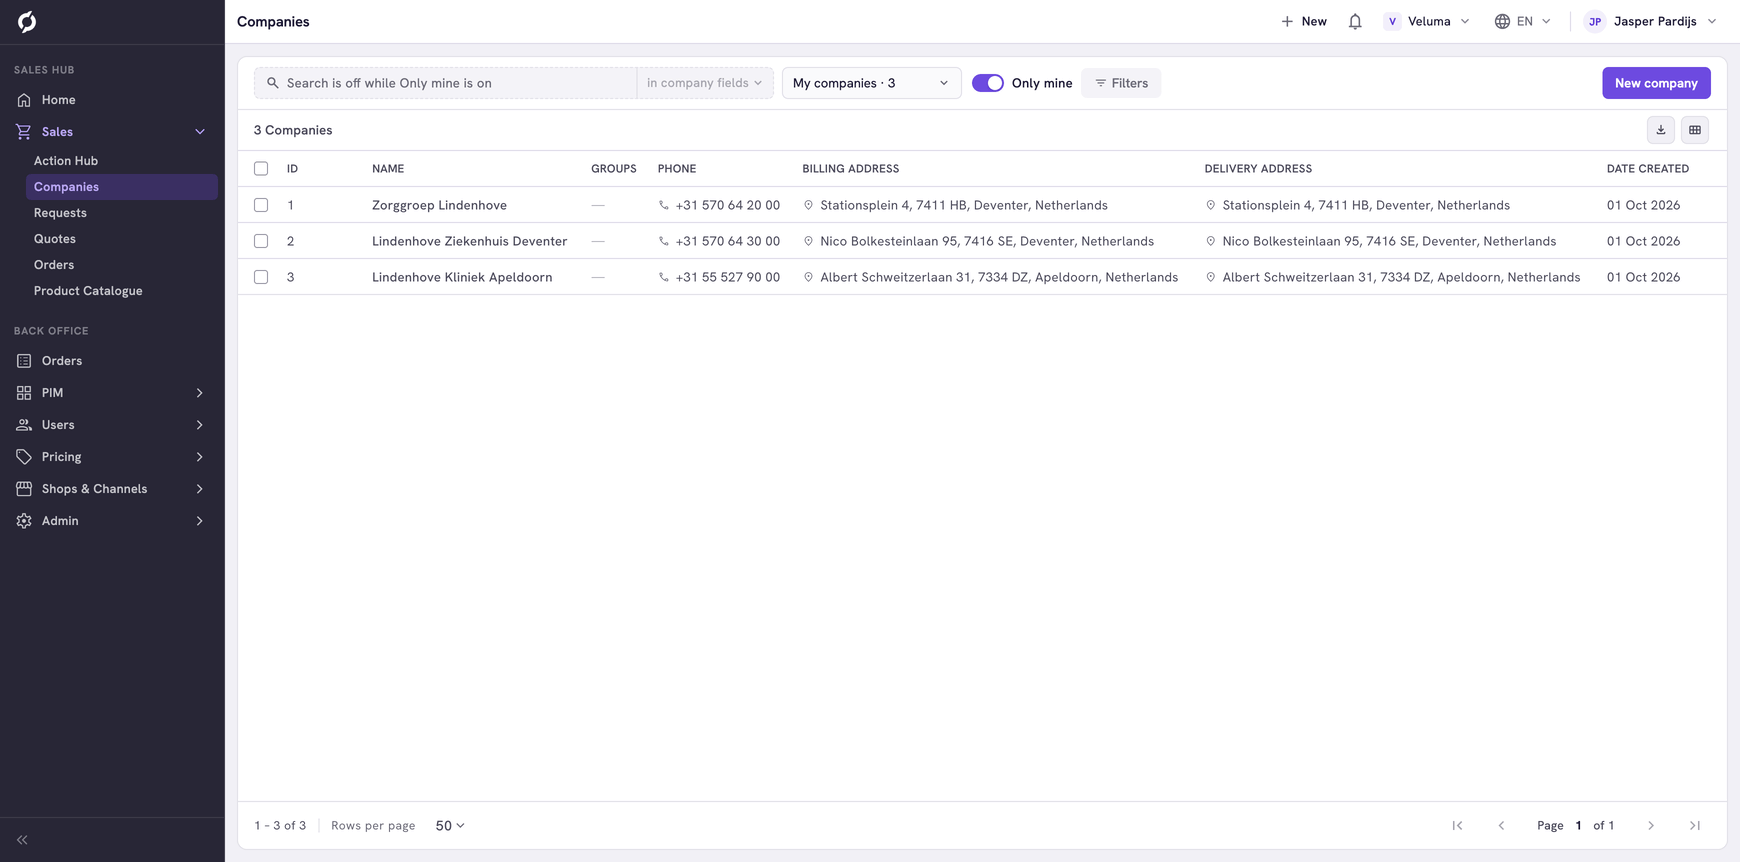
Only mine works on every Sales Hub list at once: companies, requests, quotes and orders. The counts on the Home page follow it too. If a quote or an order seems to be missing, check whether Only mine is on.
On the Companies list the search and the filters are off while Only mine is on. Propeller remembers your companies. Switch Only mine off to see everything again.
Choose the columns
- Click the Table editor, the grid icon at the right above the table. The Choose columns dialog opens.
- Drag a column from Available columns to the place you want in Columns in view. Click the × on a column to take it out of view.
- Click Save.
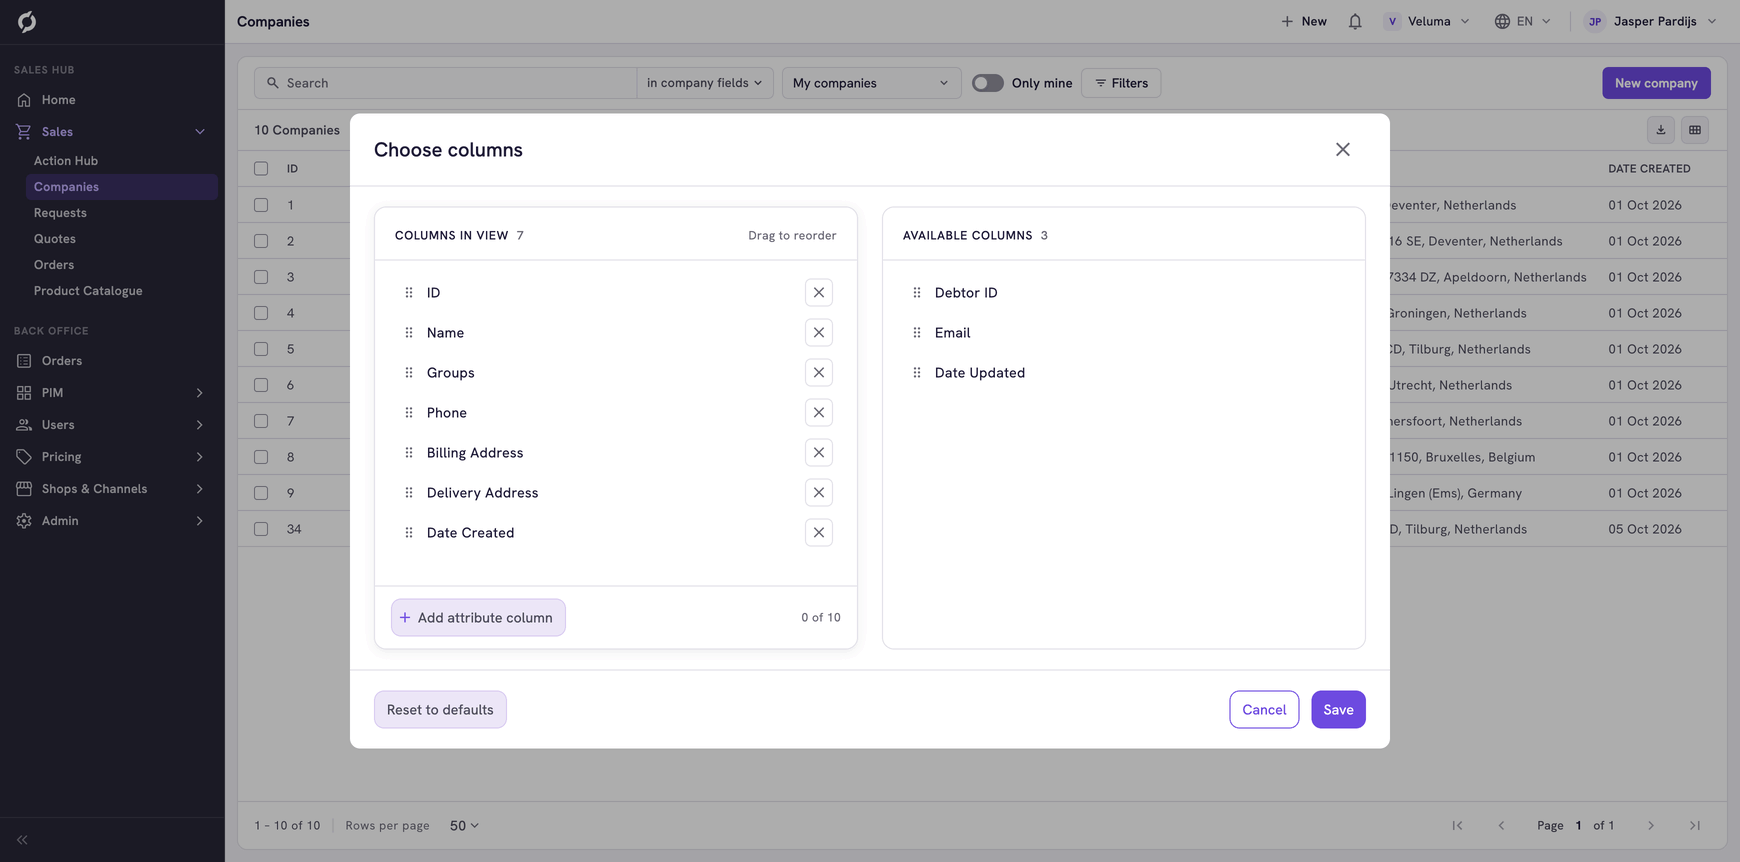
Click Add attribute column to show your own fields as columns, up to ten per list. See Attributes. An attribute column only shows its value. You cannot sort or filter on it.
To go back to the standard columns, click Reset to defaults and then Save.
Download the list
Click Export table, the download icon next to the Table editor. Propeller downloads the current view of the table as a CSV file, which you can open in Excel.
Change several rows at once
- Tick the rows. The row above the table now counts them, for example 3 selected.
- Click a button in that row, for example Delete.
A delete asks you to confirm first. The buttons differ per list and are described on the page of that list.
Click the count, for example 3 selected, to see only the rows you ticked, also those on other pages. There, Clear selection unticks them all. Back to all, followed by the name of the list, shows the whole list again.
Move between pages
Under the table, Rows per page sets how many rows you see. The arrows take you to the first, the previous, the next or the last page. To jump to a page, type its number after Page and press Enter.
Related pages
- Find your way around - the menu and the top bar
- Companies - the list most sales reps start from