Event Actions
Event actions let you automate responses to system events. When an event occurs (for example, an order is confirmed or a quote is sent), the system can send an email using a template or post data to a webhook URL.
Before you begin
- You need the Configuration role to view this page.
- You need Owner access on the Configuration role to create or delete event actions.
View event actions
Go to Shops & Channels > Event Actions to see a table of all configured event actions.
| Column | Description |
|---|---|
| Name | Action name (localized) |
| Trigger | The event that triggers this action, for example QUOTE_SEND_REQUEST or ORDER_UPDATED (sortable) |
| Action | Send Email or Post to Webhook |
| Channels | Which sales channels this applies to ("All" if none specified) |
| URL | Webhook URL (or "/" for email actions) |
| Date Created | When created (sortable) |
| Date Updated | When last modified (sortable) |
Create an event action
- Click New Event Action.
- Choose the Type: Send Email or Post to Webhook.
- Select an Event Trigger from the dropdown (for example QUOTE_SEND_REQUEST, ORDER_UPDATED).
- Optionally select one or more Channels to restrict the action to specific sales channels. Leave empty to apply to all channels.
Leave the Channels field empty to trigger the event action for all sales channels. To send different confirmation emails to B2B and B2C customers, create separate event actions with the same trigger but different channel and template assignments.
- Enter a Name in at least one language.
- Optionally enter a Registration Id and Code for identification.
- Fill in the type-specific fields (see below).
- Click Save.
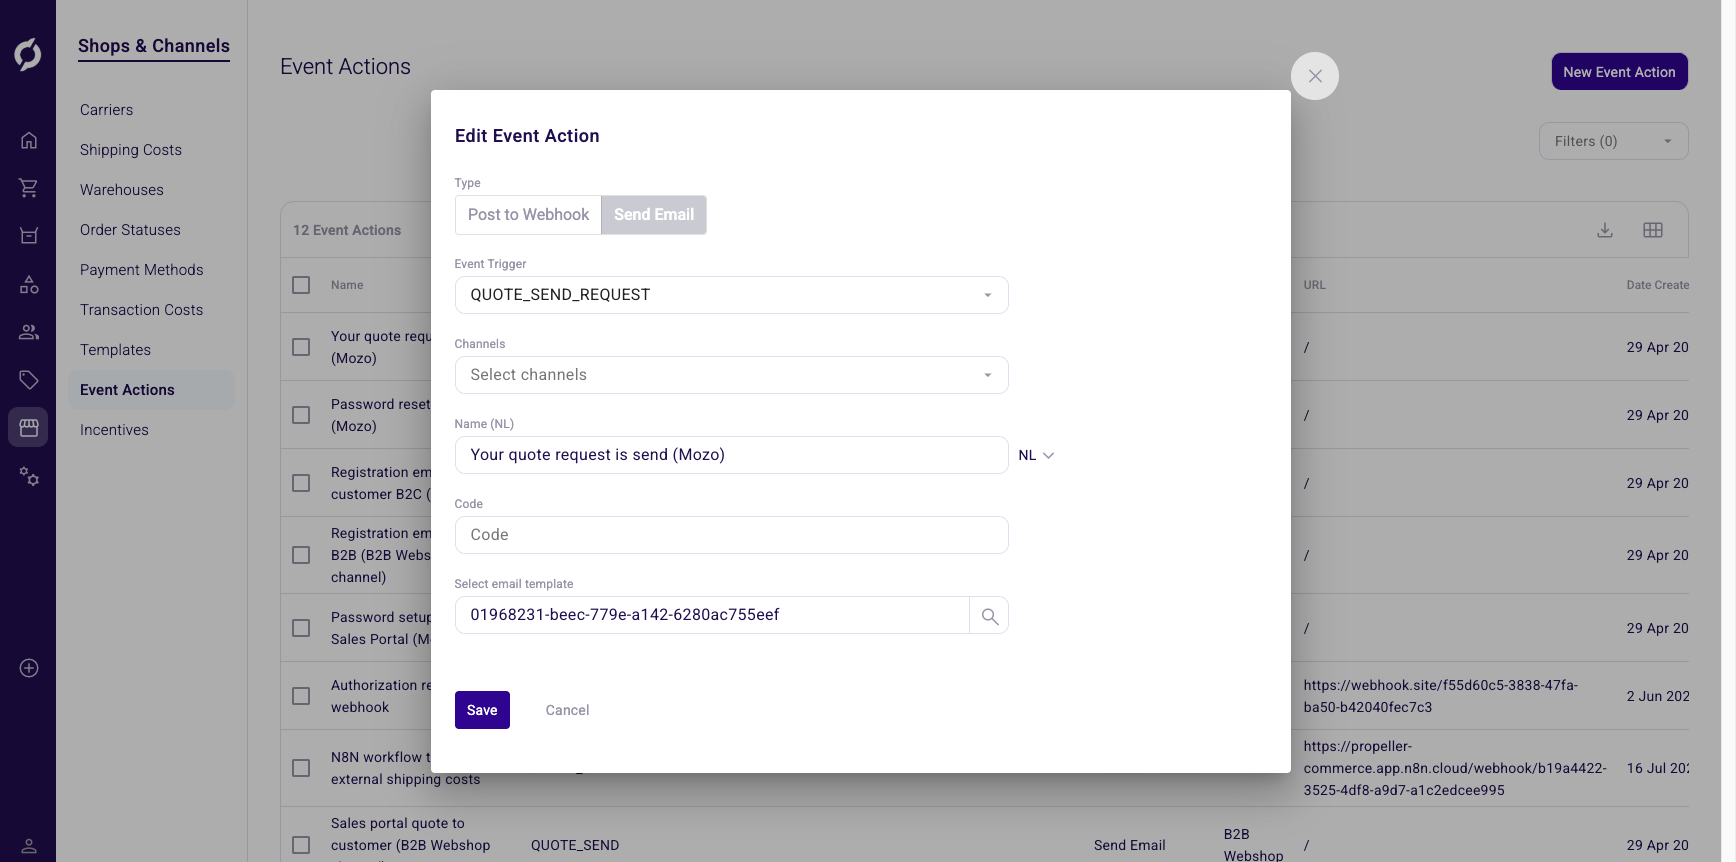
Configure a Send Email action
For email actions, select the email template to use. The template picker shows available email templates by ID.
| Field | Required | Description |
|---|---|---|
| Type | Yes | Set to Send Email |
| Event Trigger | Yes | The system event that triggers this email |
| Channels | No | Restrict to specific sales channels |
| Name | Yes | Action name (localized) |
| Registration Id | No | Registration identifier for the linked email template |
| Code | No | Optional identifier code |
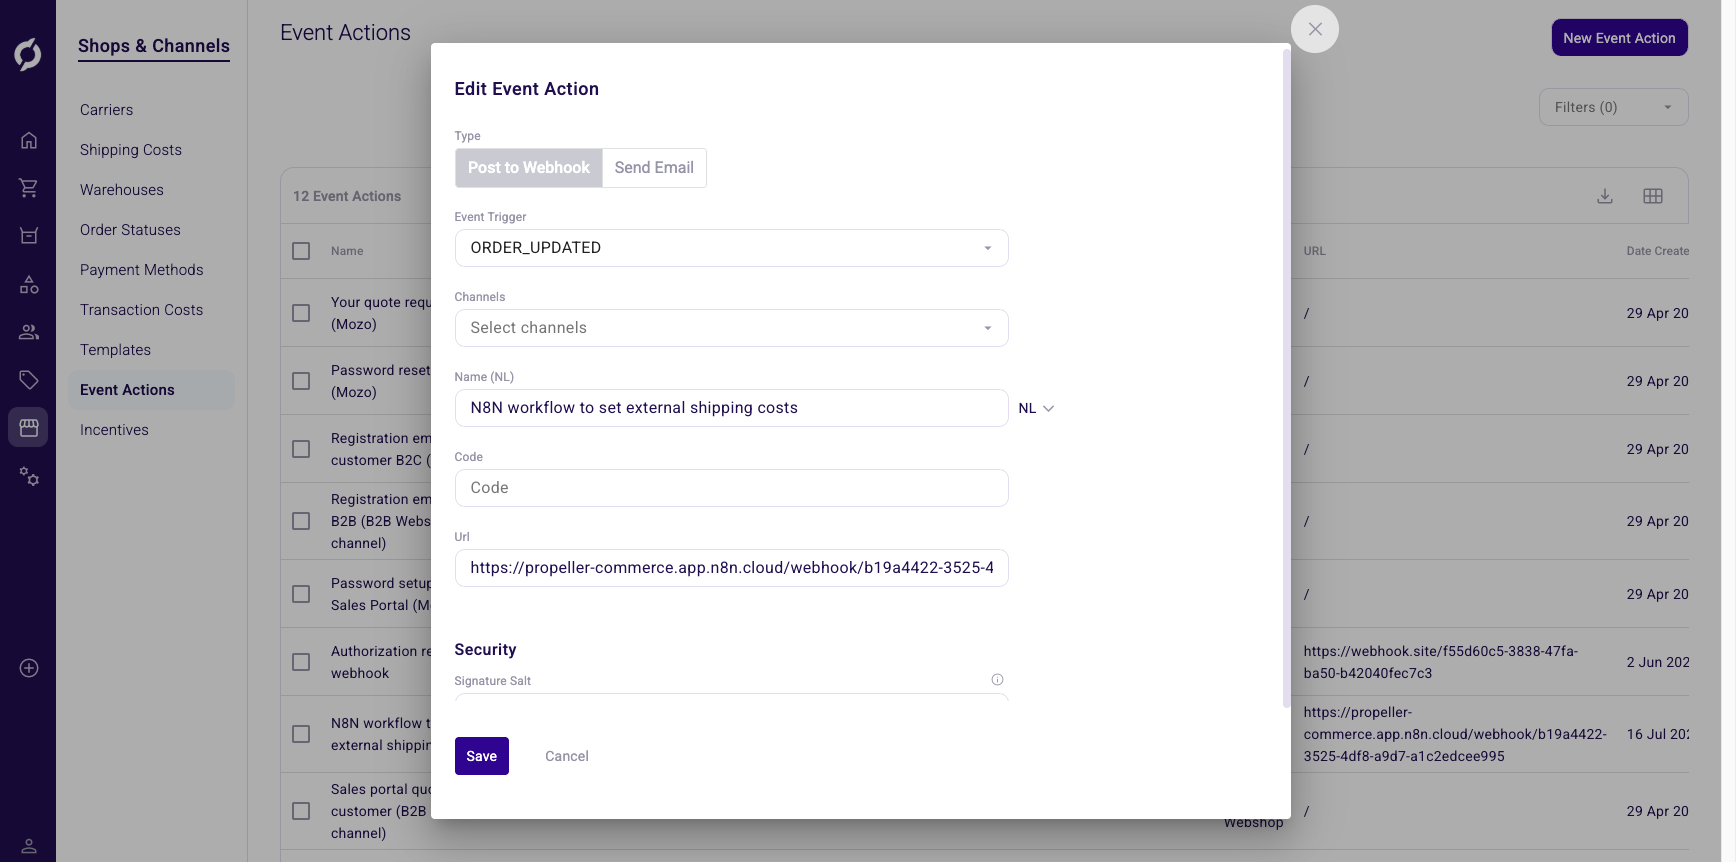
Configure a Post to Webhook action
For webhook actions, enter the URL that should receive event data.
| Field | Required | Description |
|---|---|---|
| Type | Yes | Set to Post to Webhook |
| Event Trigger | Yes | The system event that triggers this webhook |
| Channels | No | Restrict to specific sales channels |
| Name | Yes | Action name (localized) |
| URL | Yes | Webhook endpoint URL |
| Code | No | Optional identifier code |
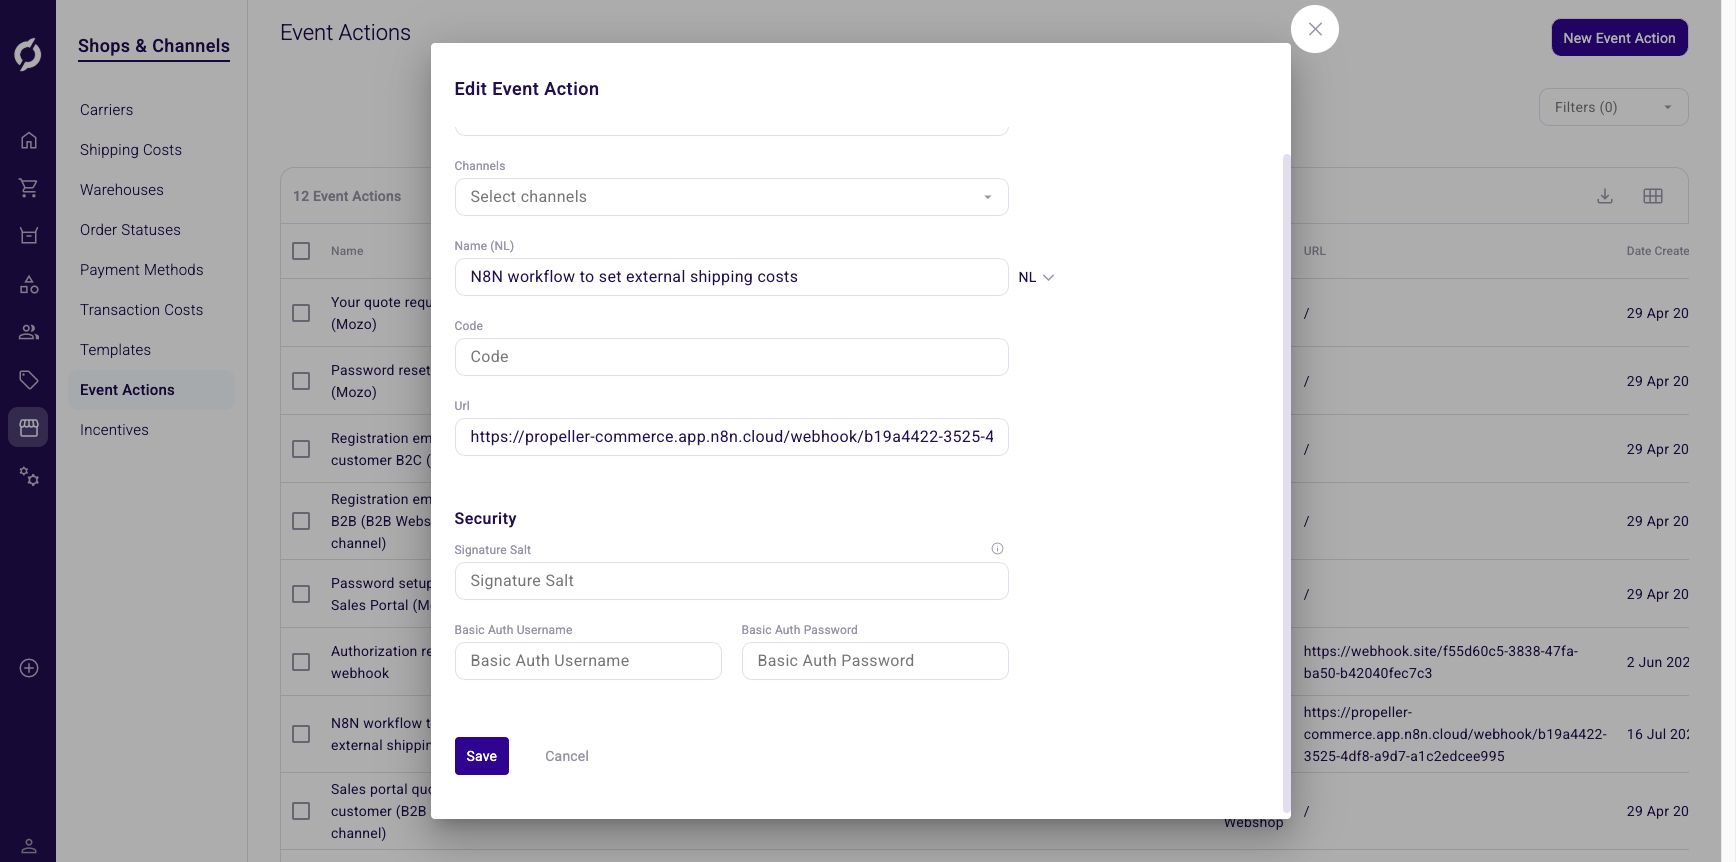
Configure webhook security
The Security section lets you secure webhook requests with request signing or basic authentication.
| Field | Description |
|---|---|
| Signature Salt | Secret key used for HMAC-SHA256 request signing. The receiving endpoint can verify the signature to confirm the request came from Propeller. |
| Basic Auth Username | Username for HTTP Basic Authentication. Requires a password. |
| Basic Auth Password | Password for HTTP Basic Authentication. Requires a username. |
Edit an event action
Click any row to open the edit dialog. The action type cannot be changed after creation.
Delete event actions
- Select one or more event actions using the checkboxes.
- Use the delete action.
- Confirm the deletion.
Filter event actions
| Filter | Type | Description |
|---|---|---|
| Codes | Multi-value chips | Filter by action codes |
| Trigger | Multi-select dropdown | Filter by event trigger types |
Related pages
- Templates - manage the email and document templates used by event actions
- Order Statuses - configure order statuses that trigger events