Order Lists
Order lists control which products specific users or companies can order. A positive order list acts as a whitelist where only listed products can be ordered. A negative order list acts as a blacklist where listed products cannot be ordered.
Before you begin
- You need the Shop role to view order lists.
- Creating new order lists requires Owner access on the Shop role.
Browse order lists
Go to Users > Order Lists to open the overview. The table shows the following columns:
| Column | Description |
|---|---|
| ID | List ID |
| Description | List description (localized) |
| Type | Positive (whitelist) or Negative (blacklist) |
| Code | List code |
| Extra | Extra field (localized) |
| Partner entity | Partner entity identifier |
| Active | Whether the list is active |
| No. products | Total products and clusters |
| No. assigned users | Total users and companies |
| Valid from | Start date |
| Valid to | End date |
| Date Created | When created |
| Date Updated | When last modified |
Search and filter
Type in the Search by code field to find order lists by code.
Click Filters to open the filter panel with additional options:
| Filter | Type | Description |
|---|---|---|
| Ids | Multi-value | Filter by list IDs |
| Codes | Multi-value | Filter by codes |
| Partner Entities | Multi-value | Filter by partner entity |
| User IDs | Multi-value | Filter by assigned user IDs |
| Company IDs | Multi-value | Filter by assigned company IDs |
| Product IDs | Multi-value | Filter by contained product IDs |
| Cluster IDs | Multi-value | Filter by contained cluster IDs |
| Type | Radio | Positive or Negative |
| Active | Radio | Active or Inactive |
| Valid To | Date range | Filter by end date |
| Valid From | Date range | Filter by start date |
| Date created | Date range | Filter by creation date |
| Date changed | Date range | Filter by modification date |
Create an order list
- Click New Order List in the top-right corner.
- Fill in the general settings (see the field reference below).
- Click Save to create the order list.
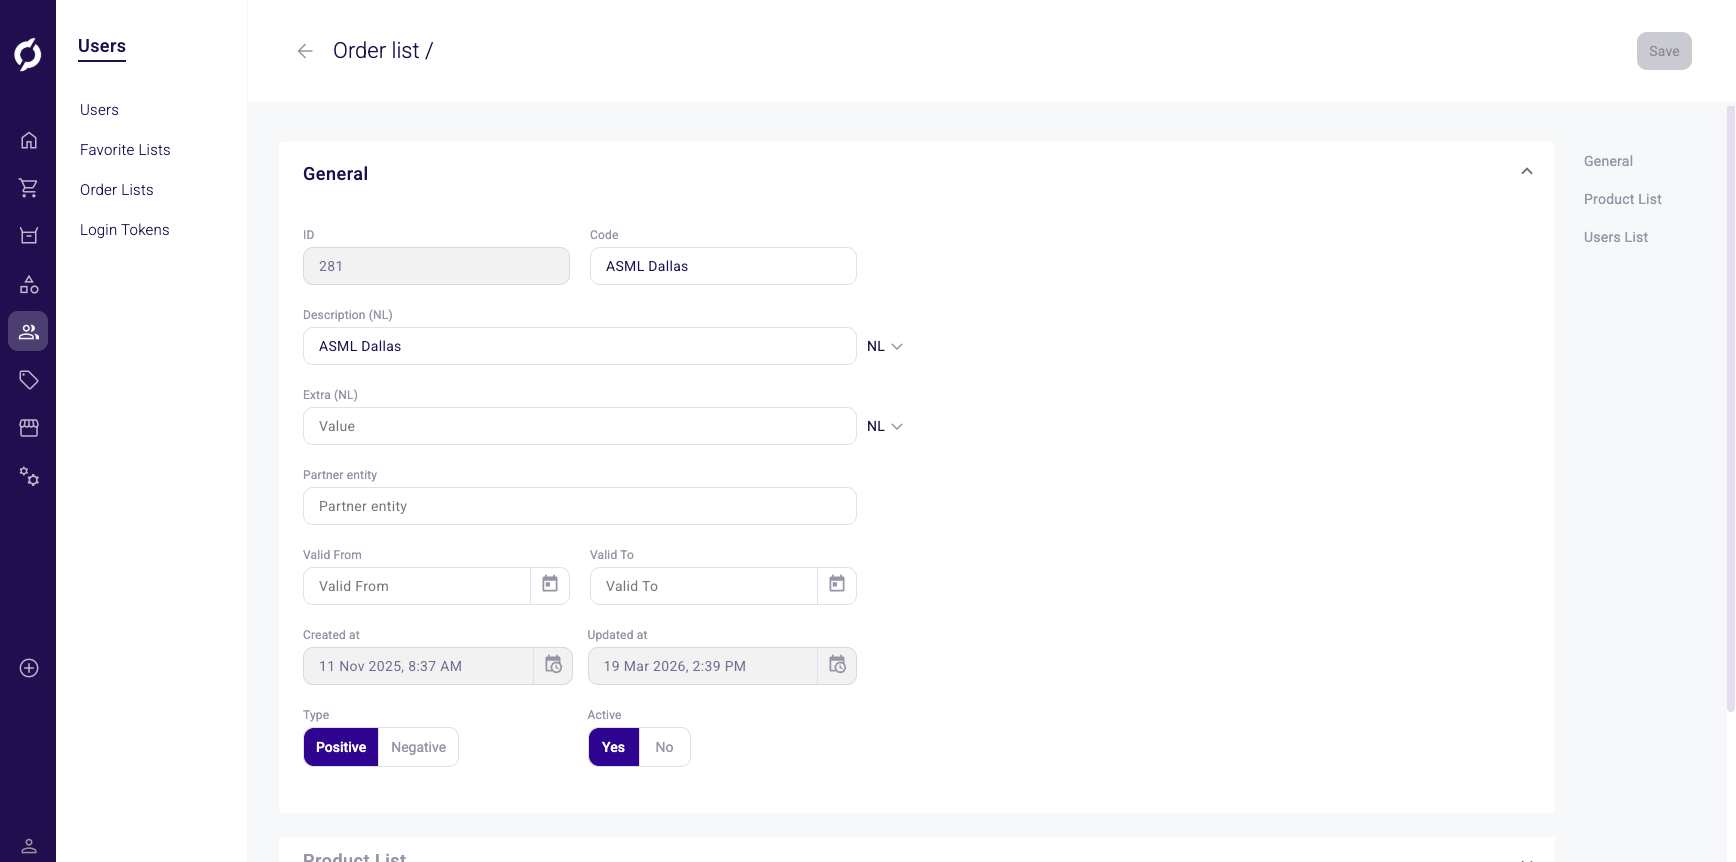
Edit order list details
Click any row in the overview table to open the detail page. The General section contains the following fields:
| Field | Description | Editable |
|---|---|---|
| ID | Unique identifier | No |
| Code | List code | Yes |
| Description | List description with language switcher | Yes |
| Extra | Additional field with language switcher | Yes |
| Partner entity | External partner reference | Yes |
| Valid From | Start date | Yes |
| Valid To | End date (must be after Valid From) | Yes |
| Created at | Creation timestamp | No |
| Updated at | Last modification timestamp | No |
| Type | Positive (whitelist) or Negative (blacklist) toggle | Yes |
Use a Positive list when a customer should only order from a specific product range (e.g. a contracted catalogue). Use a Negative list to block specific products (e.g. discontinued items) while keeping the rest available.
| Active | Yes or No toggle | Yes |
Click Save to persist your changes.
Add products or clusters
The Product List section has two tabs: Products and Clusters.
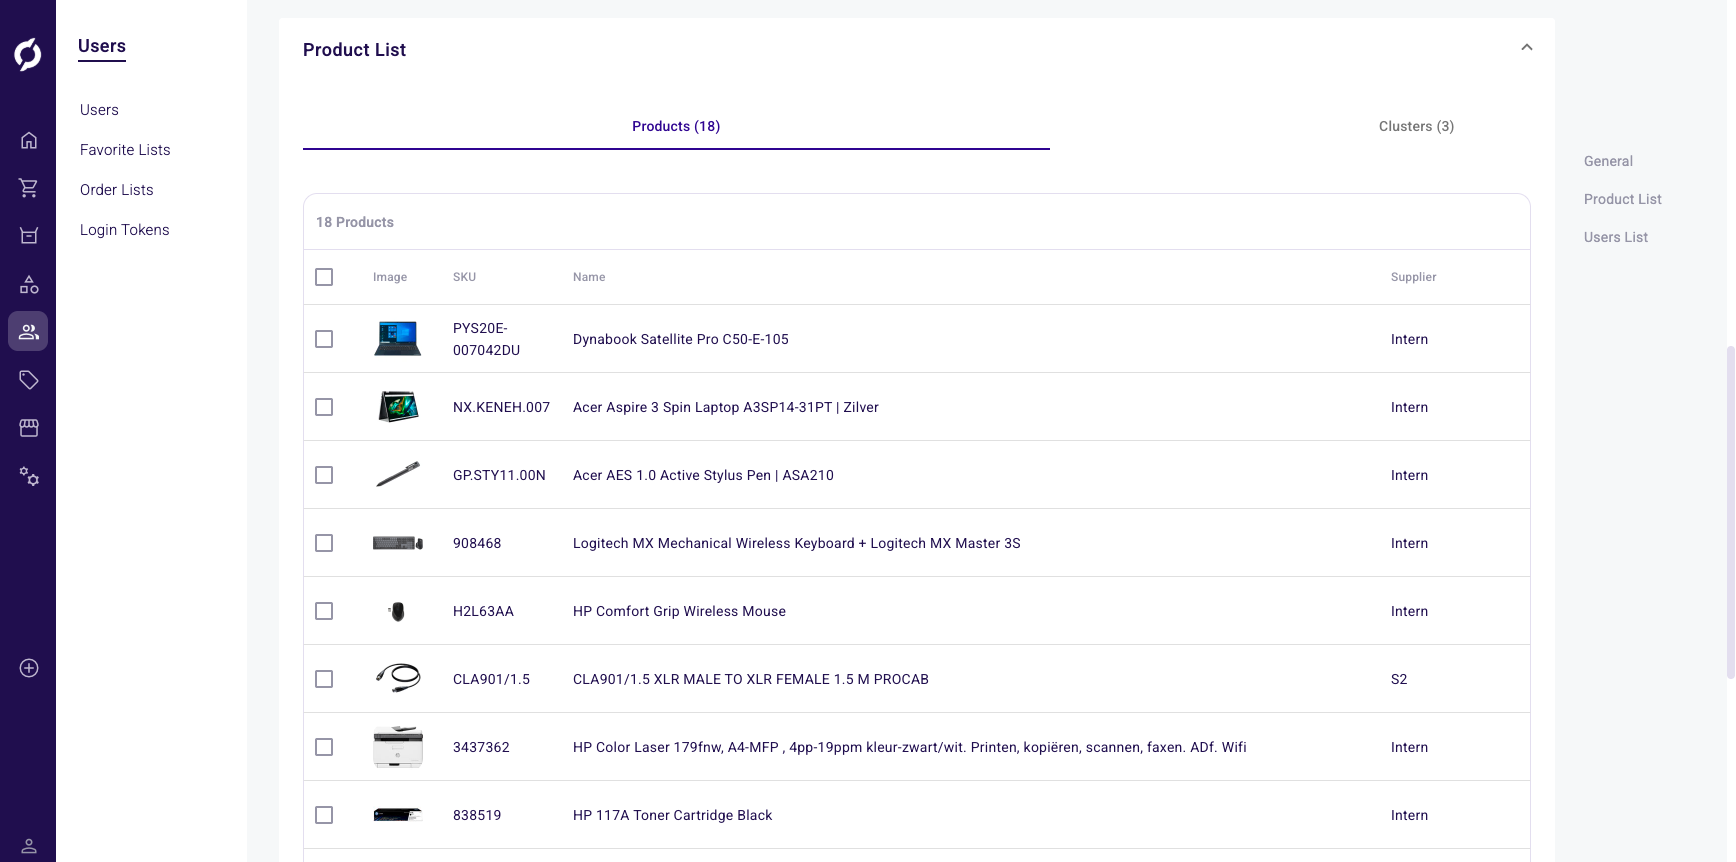
Each tab shows a table with the following columns:
| Column | Description |
|---|---|
| Image | Product thumbnail or cluster icon |
| SKU | Product SKU |
| Name | Product name |
| Supplier | Supplier name |
- Open the Products or Clusters tab.
- Click Add multiple products (or Add multiple clusters on the Clusters tab).
- A product picker opens. Search and select the items you want to add.
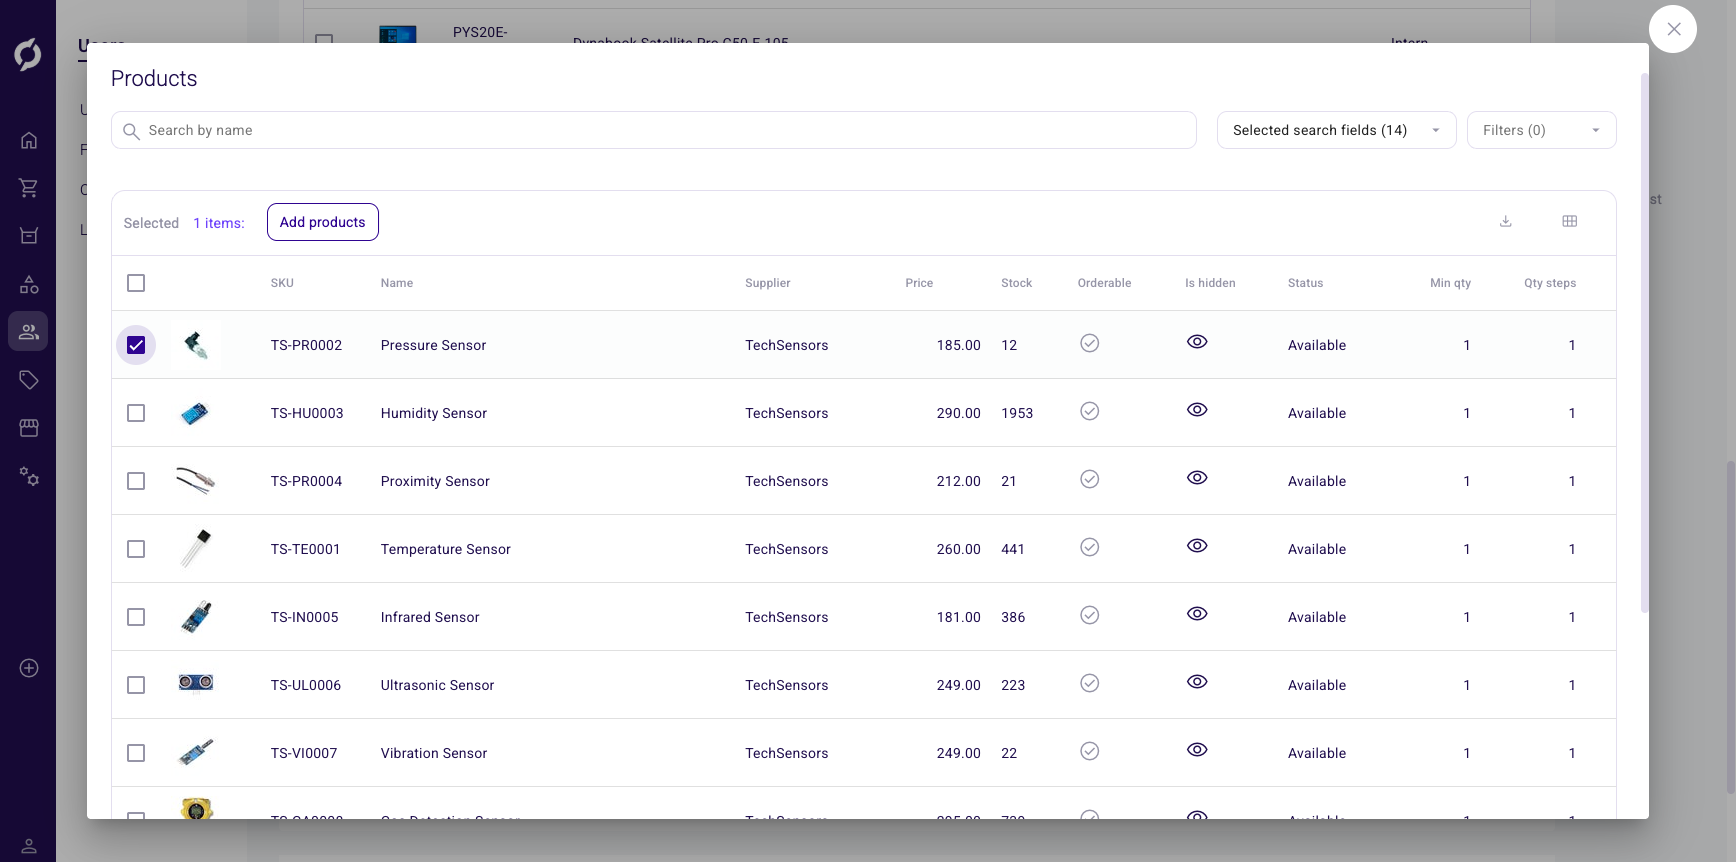
- Click confirm to add the selected items to the list.
Remove products or clusters
- Select items using the checkboxes.
- Click Remove selected and confirm in the dialog.
Assign users and companies
The Users List section has two tabs: Users and Companies.
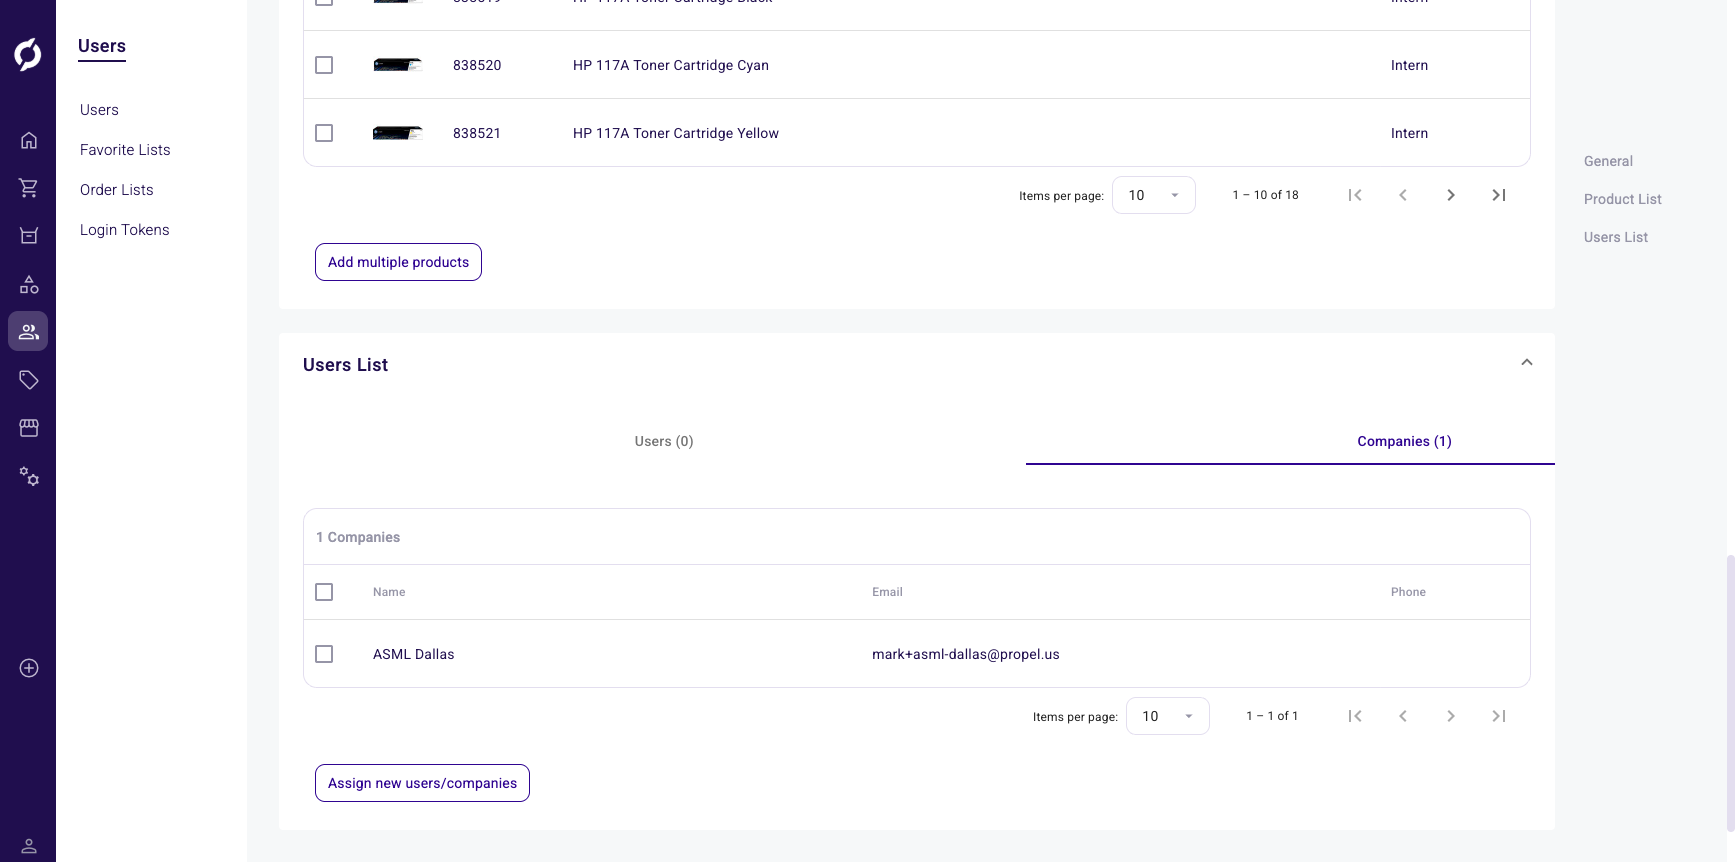
Assign companies
- Click Assign new users/companies.
- In the dialog, switch to the Companies (B2B) tab if needed.
- Search for and select the companies you want to assign.
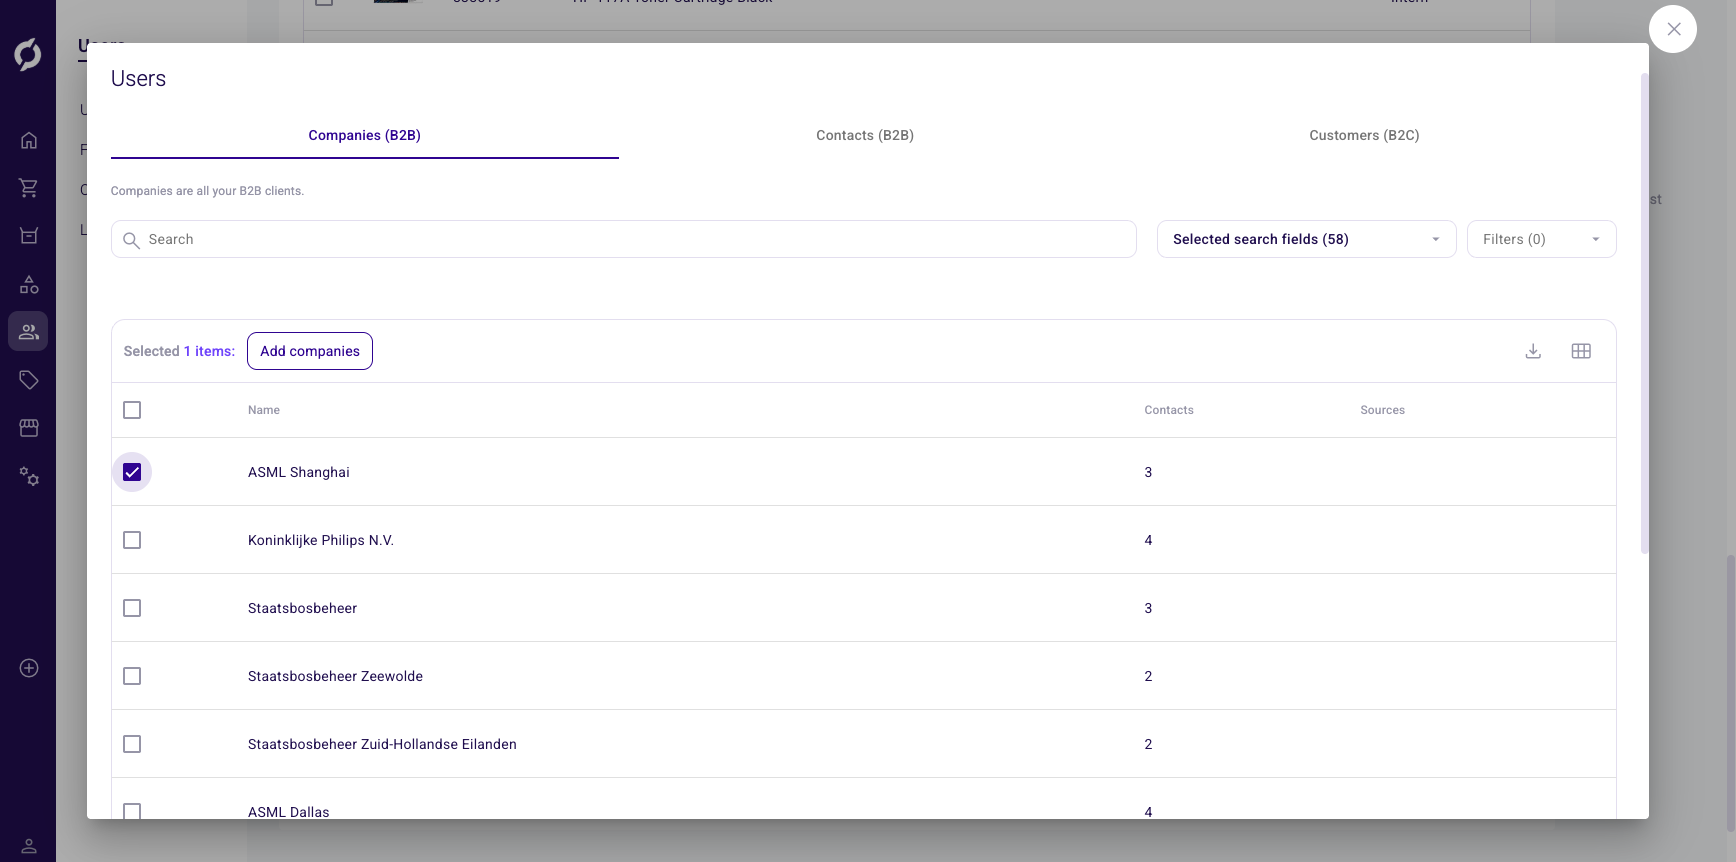
- Click Add companies to confirm.
Assign users
- Click Assign new users/companies.
- Select the Contacts (B2B) or Customers (B2C) tab.
- Search for and select the users you want to assign.
- Click confirm to assign them.
Remove assignments
- Select users or companies using the checkboxes.
- Click Remove selected and confirm.