Create and manage API keys
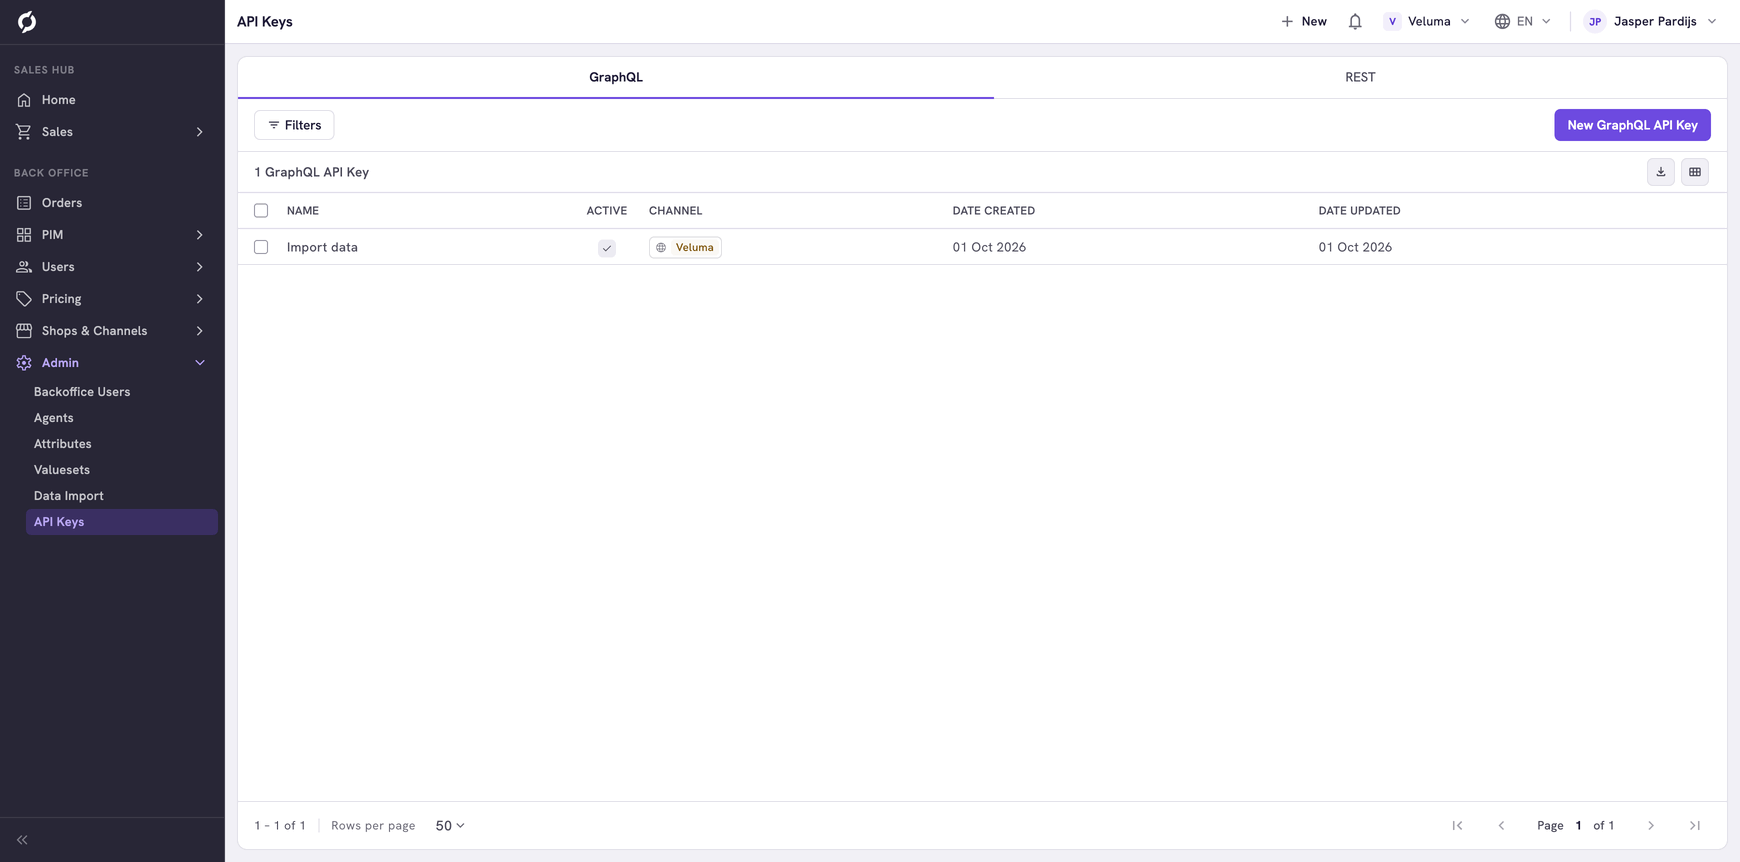
An API key lets another system read or change data in your environment, for example your ERP, a webshop or a workflow from the Agent Hub. You make the key here and hand it to the colleague who sets up the connection.
Before you begin
- You need Backoffice access and the API Keys role. To change a key you need Editor or Owner access. To create or delete one you need Owner access.
- Ask the colleague who builds the connection which kind of key they need and what it has to be able to do.
An API key works as a password for a system. Give it only the roles the connection needs, and send it only to the colleague who needs it.
Choose the kind of key
| Tab | You get | Use it for |
|---|---|---|
| GraphQL | One key | The GraphQL API. The examples of the Agent Hub use this one |
| REST | A client id and a client secret | The REST API, when the other system asks for a client id and secret |
Create a GraphQL key
- Go to Admin > API Keys and click New GraphQL API Key on the GraphQL tab.
- Type a Name that says what the key is for, for example "Workflows in n8n".
- Click Add Role for every role the connection needs and choose its access level. A key uses the same roles as a colleague, see Roles and permissions.
- Switch Active on. A new key is switched off, and a key that is off does not work.
- Click Save.
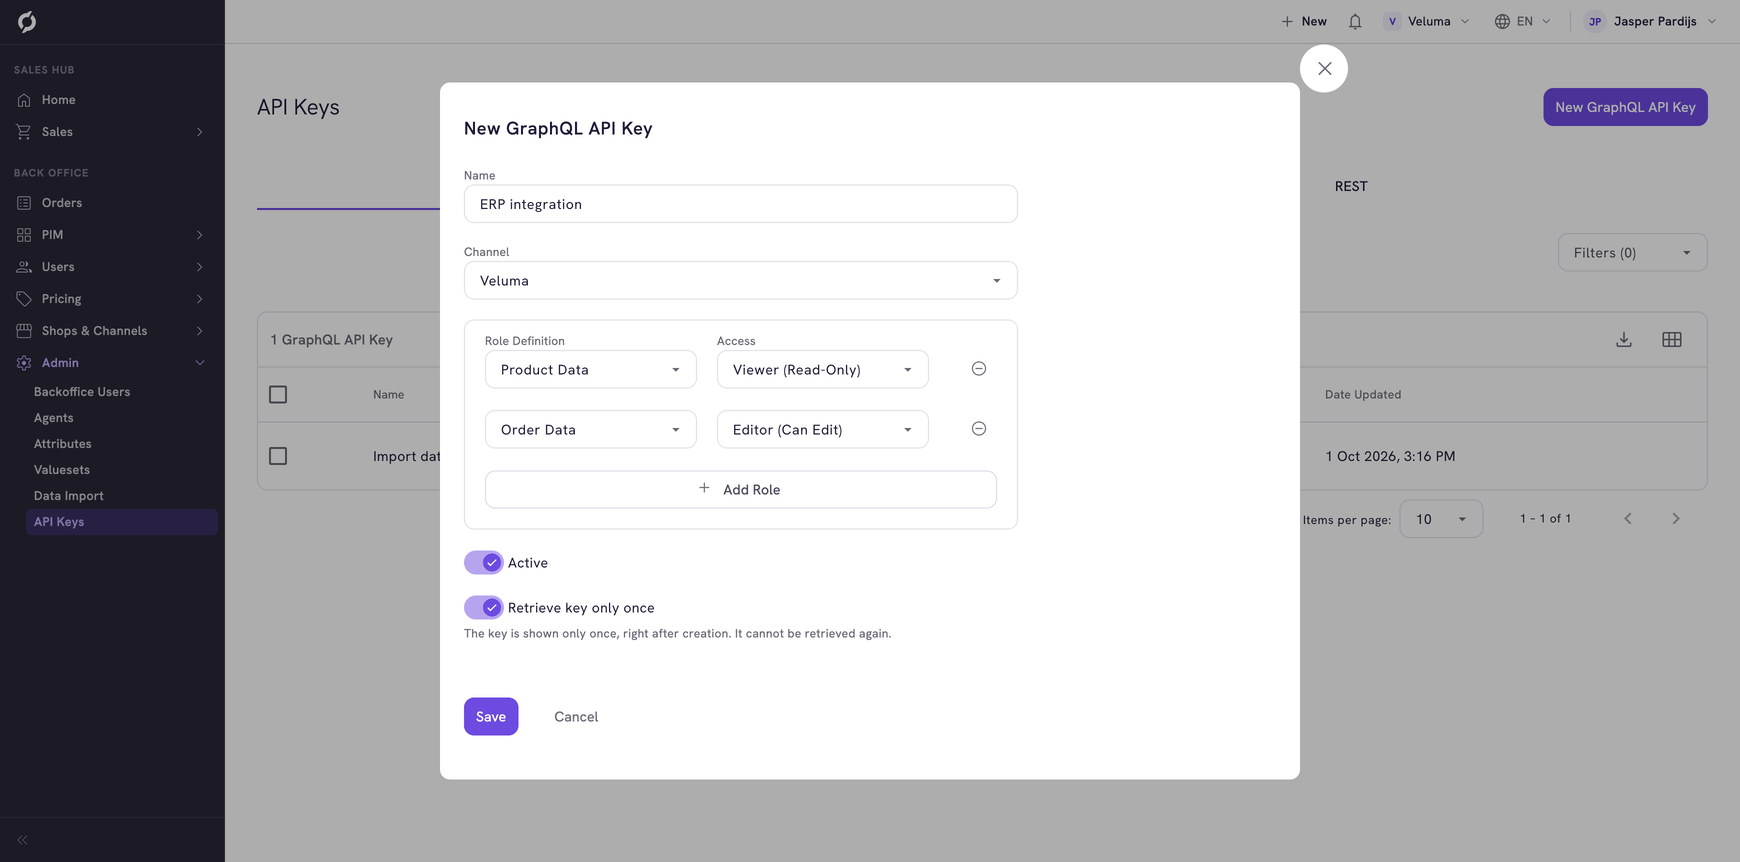
The key now shows in the API Key field. Click the eye to see it and the copy icon to copy it.
| Field | What it does |
|---|---|
| Channel | The channel the key belongs to, when the connection is for one channel |
| Retrieve key only once | With this on, the key shows only now, right after you save. Copy it before you close the dialog |
Create a REST key
- Click the REST tab and click New REST API Key.
- Type a Name and switch Active on.
- Click Save.
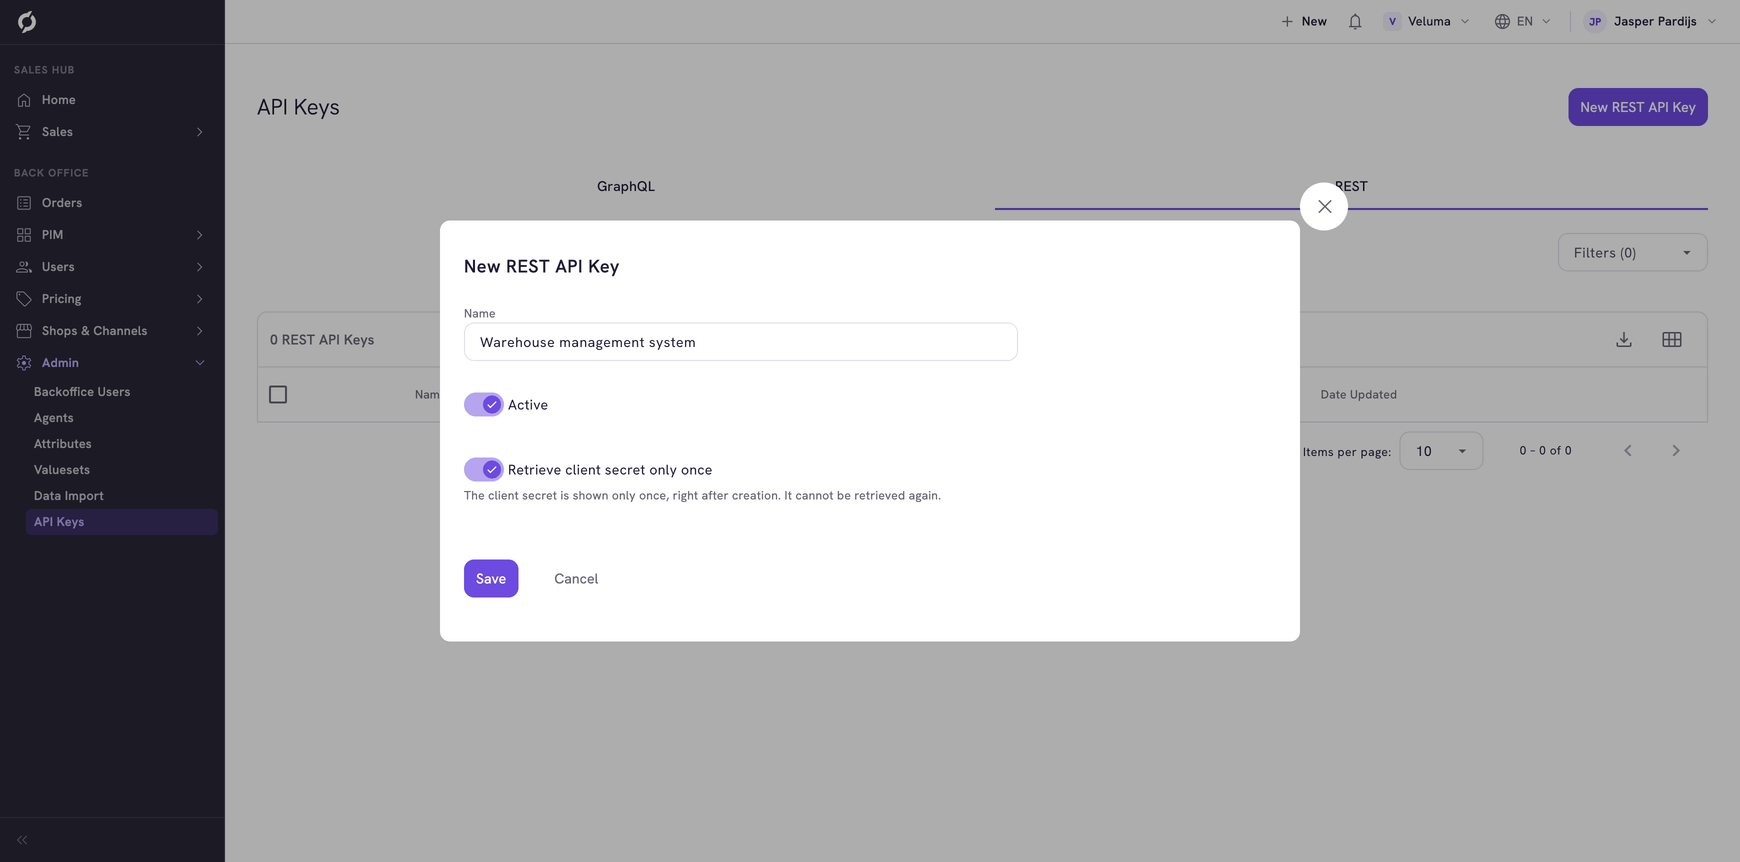
The Client Id and the Client Secret now show. With Retrieve client secret only once on, the secret shows only now.
Change what a key can do
Click the key in the list. You can rename it, change its roles and access levels and switch it on or off. With "only once" on you cannot see the key or the secret again. If it is lost, make a new key and delete the old one.
Stop or delete a key
- To stop a key for now, open it and switch Active off. You can switch it on again.
- To remove it, tick the key, click Delete and confirm. Every connection that still uses the key stops working, and a deleted key cannot be brought back.
Related pages
- Roles and permissions
- Set up n8n and connect it to Propeller - use a key in a workflow