Install a workflow from the library
Every example in the library is installed in the same way: you import a file into n8n, connect your accounts, set a few values, test it and switch it on. The library page of an example tells you which values to use.
Before you begin
- You have an n8n account and the credential
Propeller API key. See Set up n8n and connect it to Propeller. - A background workflow runs by itself. An agent is started by a colleague with the Workflows button in Propeller. Each library page says which it is.
Import the file
- On the library page of the example, click the download button and save the file.
- In n8n, create a new workflow.
- Click the three dots at the top right and choose Import from File. Pick the file you saved.
n8n calls each block of the workflow a node.
Connect your accounts
- Double-click each node that talks to Propeller and check that Credential for Header Auth shows
Propeller API key. - If the example uses AI, open each AI node and pick your OpenAI account.
- If the example reads a mailbox, open the Gmail node and connect the mailbox.
Change the settings
Double-click the node called Settings. It holds one line per setting.
MIN_VALUE: 250,
ASSIGN_TO_ADMIN_USER_ID: null,
ORDER_STATUSES: ['NEW', 'CONFIRMED'],
TEXT_OK: 'Approved',
Change only what is between the colon and the comma.
| Kind of value | How to write it | Example |
|---|---|---|
| A number | Digits, without quotes | 250 |
| A text | Between single quotes | 'Approved' |
| A list | Between square brackets, every item in quotes, commas between them | ['NEW', 'CONFIRMED'] |
| Nothing | The word null | null |
| Yes or no | The word true or false | true |
Leave API_URL, the address of Propeller, as it is unless you test against another environment.
Fill in order status codes
Some examples ask which order statuses count as an order. They need the code of a status, not its name.
- In Propeller, go to Shops & Channels > Order Statuses.
- Read the Code column, for example NEW for the status Order.
Leave out the draft statuses unless the library page says otherwise. See what each status means.
Test a background workflow
- Click Execute workflow at the bottom of the screen. The workflow runs once.
- Look in Propeller for the result, for example a new action in the Action Hub under All Actions.
A test run is a real run. It creates real actions, quotes or orders. Test in a test environment, or clear away what the test made.
If nothing appears, the example may have found nothing that needs attention. The Executions tab in n8n shows every run and marks a failed one.
Switch the example on
Click Publish at the top right and confirm. In older versions of n8n this is the switch Active. From now on the example runs by itself, and every run counts towards your n8n plan.
Register the agent in Propeller
Only for an agent.
- In n8n, double-click the Webhook node and create a login under Authentication, with a username and a password you make up.
- Copy the Production URL of the node.
- Publish the workflow, as above. The address only answers after that.
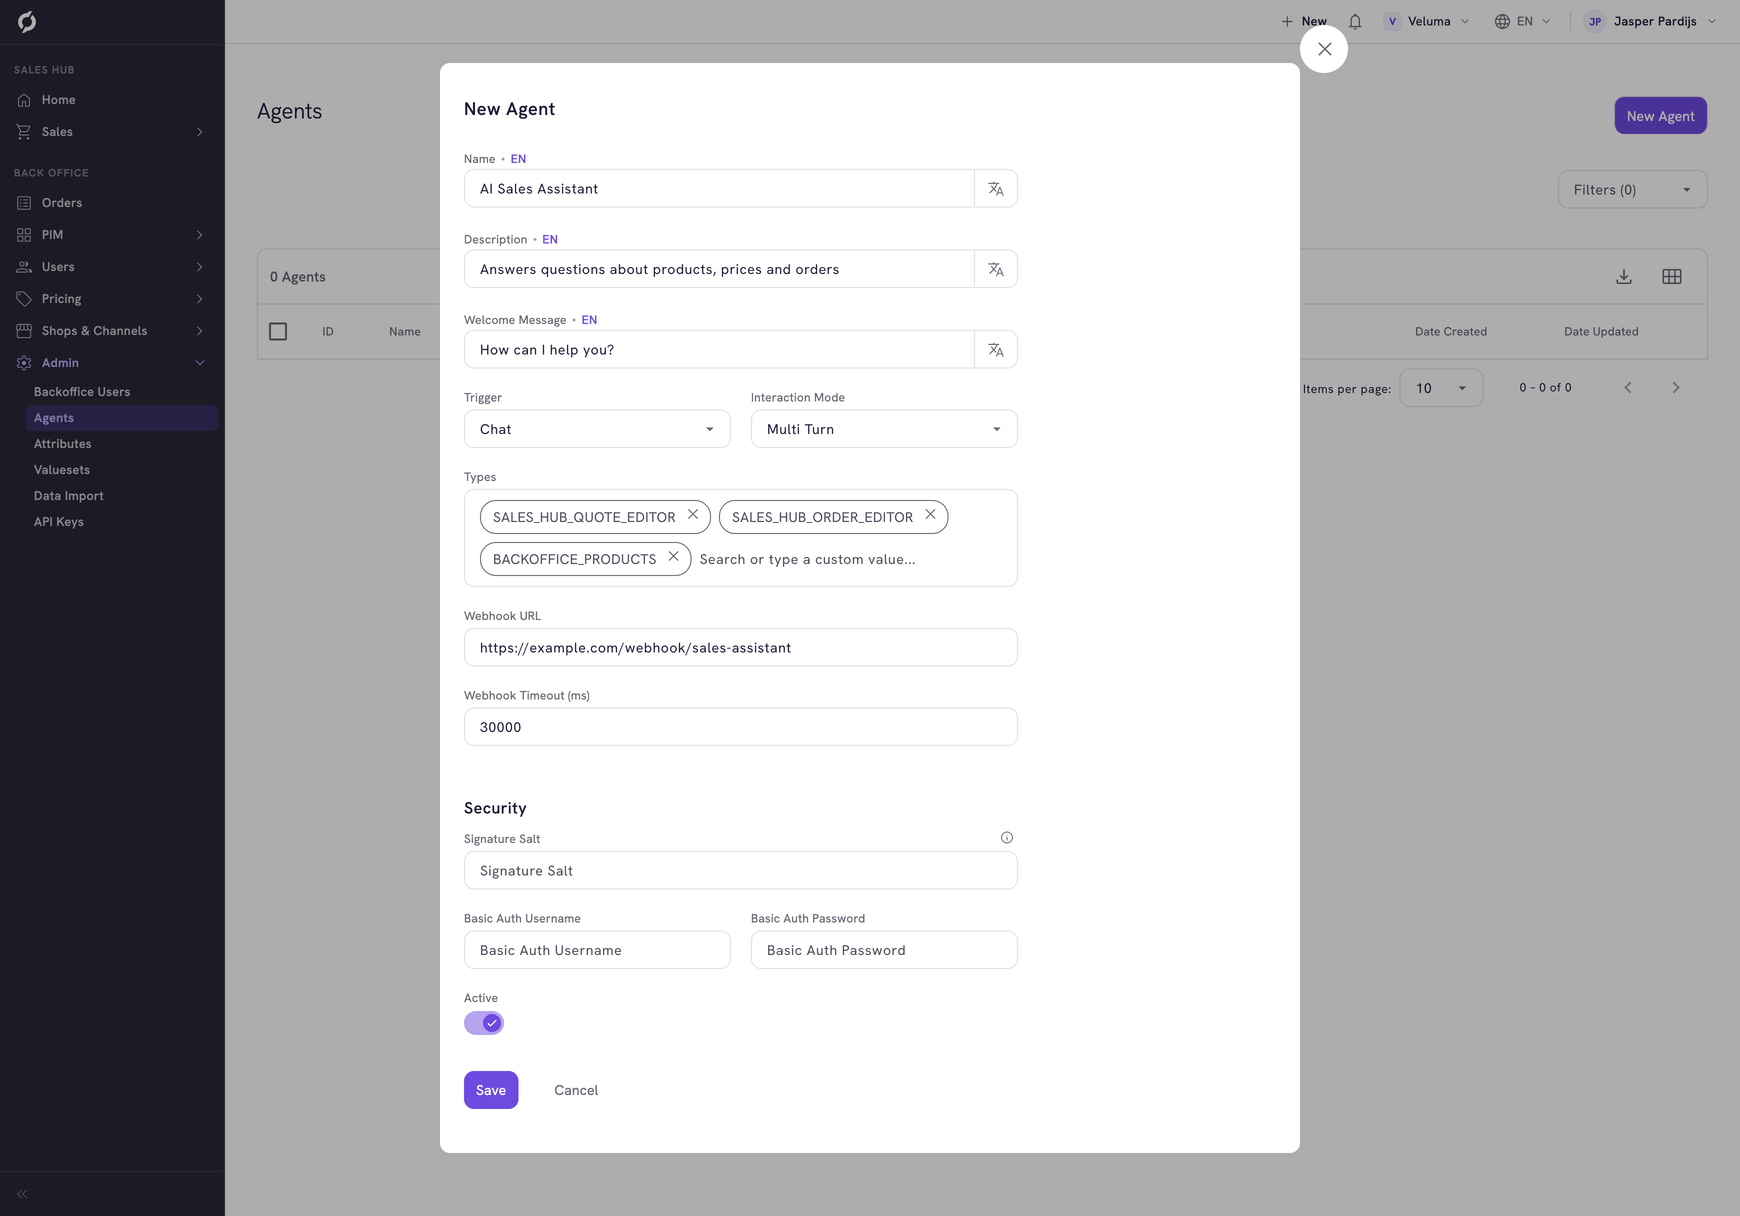
- In Propeller, go to Admin > Agents and click New Agent.
- Fill in the Name and the Description your colleagues will see.
- Fill in the Trigger, the Interaction Mode and the Types from the library page.
- Paste the address under Webhook URL and type the login under Basic Auth Username and Basic Auth Password.
- Switch Active on and click Save.
Open a page of the type you chose and click Workflows. Your agent stands in the list. See Register an AI agent for every field.